As a triathlon journalist and coach, I love gear that works without drama. This article shows clear, practical steps for advanced gear maintenance so your kit stays reliable. You will learn bike care, wetsuit and swim gear steps, shoe and transition kit tips, and a simple schedule to follow.
Readers should expect straightforward language and focused techniques. I write as an expert who tests gear on the road and in open water. The goal is to give you confident routines that reduce failures and save time on race day.
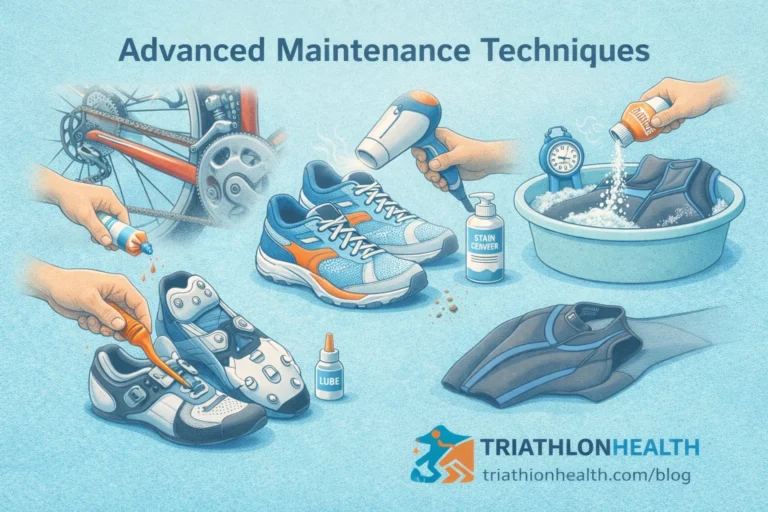
Advanced gear maintenance
Advanced gear maintenance starts with a mindset: care before problems start. Small checks after every session prevent large repairs later. I will explain choices that fit a busy training plan.
For triathletes, advanced gear maintenance covers three sport areas plus transitions. Your bike, swim kit, and run shoes all need different attention. Good routines stretch the life of expensive items and reduce the chance of mechanical DNFs.
Use this article to build a routine that fits your training load. It mixes simple actions after each session with deeper checks you do weekly or monthly. These steps are practical and easy to adopt.
Why it matters
Keeping equipment in top shape raises performance and safety. A clean, well-tuned bike shifts and brakes better. A properly rinsed wetsuit fits comfortably and lasts longer. Shoes that keep their shape reduce injury risk.
When you plan maintenance, you lower the odds of last-minute panic. You will spend less time fixing things the night before a race. That time then goes back to training, rest, or planning transitions.
Advanced gear maintenance also saves money over time. Replacing parts after they wear out is often cheaper than replacing entire pieces because damage spread from neglect can be severe. A small investment in care prevents costly replacements.
Tools and workspace

Before you start, set up a tidy, safe workspace. A small corner in a garage or hallway works. You want good light, a clean floor, and a bench or table. Keep a towel or mat to catch dirt and fluids.
Next, gather the right tools. Use quality tools that match your gear. Cheap tools can damage components. Below is a clear list of the essential tools I use and recommend for serious triathletes.
Use this list as a shopping checklist. Each item has a specific role and will save time in the long run. A few good tools replace many improvised fixes.
- Torque wrench with proper bike head sizes – prevents overtightening
- Bike stand – holds the bike steady for repairs and cleaning
- Chain cleaner and brush set – quick and thorough chain care
- Floor pump with gauge and CO2 inflator – for accurate tire pressure
- Hex key set and a compact multi-tool – for on-the-road fixes
- Soft brushes, microfiber cloths, and a gentle degreaser – for the frame and components
- Wetsuit hangers and a low-pressure washer or garden hose – for rinse and dry
- Shoe trees and a small soft brush – to keep footwear shaped and clean
Keep all tools in one case or on a pegboard so they are easy to find. Label parts and consumables like chain lube and spare tubes. This reduces the time you spend hunting for items before a ride.
Bike maintenance routine
Your bike is the most complex piece of gear. A clear routine prevents failures and keeps performance high. Do light checks after every ride, deeper checks weekly, and full service every three to six months depending on use.
After each ride, do a fast wipe down. Use a damp cloth to remove grit and a quick chain lube if the chain looks dry. These small moves stop corrosion and keep shifting smooth.
Each week, inspect brake pads, tires, and the drivetrain. Look for cuts in tires, uneven brake pad wear, and chain stretch. These checks spot issues before they cause a mechanical problem during a race.
Below is a concise checklist for a weekly bike inspection. Read it, then build it into a single block of time on your calendar.
- Check tire pressure and sidewall condition
- Inspect brake pads and adjust if needed
- Clean and lubricate the chain; measure chain wear
- Tighten bolts to correct torque values
- Spin wheels to check for wobbles and true them if necessary
- Inspect cables or hydraulic lines for wear or leaks
Monthly or after hard events, do a deeper service. Remove the chain for a thorough clean, inspect cassette teeth, and consider headset and bottom bracket checks. If you are not comfortable with these steps, a trusted mechanic is worth the cost.
Swim gear and wetsuit care
Swim gear needs gentle, consistent care. Salt, chlorine, and sun damage fabric and zippers. Simple routines stop these factors from breaking expensive items.
After every session, rinse wetsuits and swim skins in fresh water. Use cool water and turn wetsuits inside out to rinse both sides. Let items drip dry but avoid direct sun which degrades neoprene.
Here is a short list of wetsuit care steps. Follow them to keep fit and prevent zipper and seam failure.
- Rinse inside and out with fresh water soon after the swim
- Use a mild wetsuit shampoo occasionally to remove oils and sunscreen
- Hang on wide, padded hangers to avoid stretching shoulders
- Store flat or on a hanger in a cool, shaded place
- Repair small tears with neoprene cement or a patch kit
Take extra care with zippers and seals. Apply a small amount of zipper lubricant if the pull sticks. Check seals for wear and test them in warm water before race day. These small checks keep your wetsuit comfortable and reliable.
Running shoes and transition kit
Running shoes get pound-for-pound the most wear. Rotate shoes if you train a lot and inspect midsoles, outsoles, and heel counters for wear. Replace shoes before cushioning and support fail.
After runs, remove insoles and let shoes air dry. Do not use direct heat because it can warp foam. Use shoe trees if shoes hold moisture after long sessions or wet runs.
Make a short list for your transition kit and shoe care. These items keep transitions smooth and shoes ready for the race.
- Carry two pairs if training back-to-back to alternate drying
- Clean mud off lightly with a soft brush after trail runs
- Check cleat bolts and any attachment hardware if you run with pedals
- Pack quick laces, elastic shoelaces, and a small towel in your transition bag
Keep your transition bag organized. Label pockets and keep spares in clearly marked pouches. When you open the bag before a race, you should find everything at a glance. This reduces stress and saves time.
Scheduling maintenance and logs
A simple schedule stops you from guessing when to service equipment. Track miles, hours, or sessions so you have clear triggers for maintenance. This works better than vague plans like “every few months.”
Keep a maintenance log. Write down the date, work done, parts replaced, and observations. A log shows patterns like how fast your chain wears or how many sessions before shoes need replacement.
Below is a practical template you can follow. It lists common triggers and actions to keep your gear on schedule.
- After every ride: quick clean and chain lube
- Weekly: full wipe, tire check, brake pad inspection
- Monthly: drivetrain clean, wheel true, detailed gear inspection
- Pre-race: full bike check, wetsuit test, shoes ready and clean
- Every 6-12 months: professional bike service and parts replaced as needed
Set reminders on your calendar tied to training volume rather than strict dates. For example, trigger a drivetrain clean every 300-400 miles. This makes maintenance match your actual use.
Troubleshooting and advanced repairs
Even with good care, problems happen. The right troubleshooting steps help you decide what you can fix and when to see a pro. Start with simple checks and move to complex tasks once you have the right tools and confidence.
If your bike shifts poorly, check cable tension, derailleur limit screws, and chain wear. These are often the cause. Chains are common culprits; measure chain stretch before adjusting gears.
Below is a list of common problems and clear first steps you can take at home. These steps save time and prevent larger damage if done early.
- Chain skipping: clean chain, check chain wear, inspect cassette and chainring wear
- Brake rub: check wheel trueness, adjust calipers and brake pads, clean rim or rotor
- Wetsuit leaks: test in warm water, patch small holes, replace failing seams
- Shoe slippage: check insole, lacing method, and cleat tightness if applicable
For critical failures like bottom bracket noise, frame cracks, or major zipper failures, seek professional help. A trained mechanic or specialist can fix problems you should not risk handling yourself. Save time and avoid stress by using pros for complex repairs.
Key Takeaways
Advanced gear maintenance keeps your equipment reliable and race-ready. Use short daily tasks and planned deeper checks. This mix prevents failures and keeps performance high.
Create a simple workspace with the right tools. Follow weekly and monthly checklists and log your work so you see patterns. Use the phrases triathlon gear maintenance and gear maintenance techniques as guides to what to include in your routine.
Start small and build the habit. Consistent care saves money and worry. With steady attention, your gear will support training and races without surprises.