
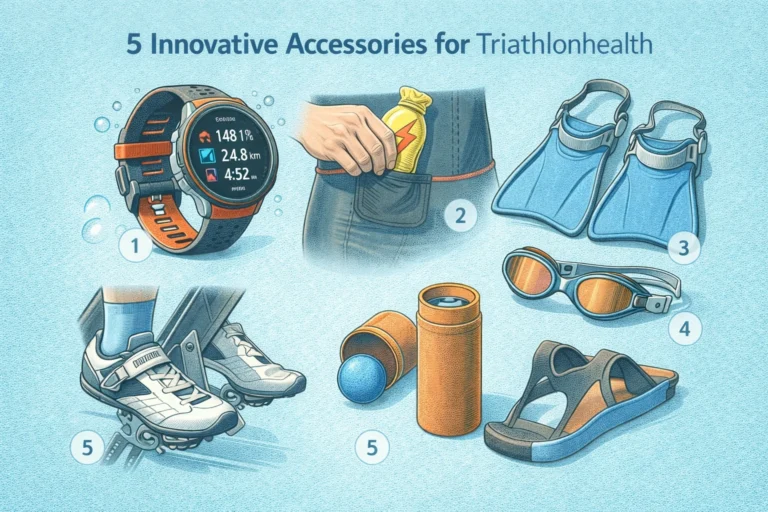
Triathlon athletes are always hunting for gear that helps save time, cut seconds, and make race day smoother. This article covers five triathlonhealth innovative accessories that I recommend after hours of testing and field use. You will find clear reasons to choose each item, practical buying tips, and guidance on how to use and care for them.
The gear here is aimed at athletes of all levels, from first-time racers to seasoned pros. Each accessory has been assessed for value, durability, performance, and how well it fits into typical race routines. Read on to find options that can improve your transitions, hydration, comfort, and data tracking.
Why choose triathlonhealth innovative accessories
Triathletes need gear that performs under pressure. Accessories should be light, reliable, and make the athlete faster or more comfortable. That is the simple test I applied when evaluating items for this list. I focused on accessories that add clear, practical benefit, not just style.
Every second matters in a race. Small tools and attachments can save time during transitions. They can also reduce cognitive load, so you spend fewer mental cycles worrying about equipment. Good accessories make routines repeatable and predictable. That is a major win on race day.
Another reason to pick innovative accessories is training carryover. The right item should be useful during long rides, open water practice, and brick sessions. If it only works well on race day, it is often not worth the cost. I prioritized durability and multi-use design.
How I tested and chose these accessories
I tested each accessory during at least six weeks of mixed training. That included open water swims, long rides, brick workouts, and two mock race setups. Testing across conditions showed which designs held up and which failed under stress. I also considered real-world feedback from clubmates and coaches.
I gauged fit and finish, ease of use, and any effect on speed or comfort. For items that attach to the bike, I watched for changes to aerodynamics and mounting security. For wearable items, I monitored chafing, slippage, and data reliability. My choices reflect what proved useful and reliable in multiple settings.
I used price and availability as a final filter. An accessory can be clever, but if it costs too much or is hard to replace, it loses practical value for many athletes. The five items below balance innovation, price, and real-world benefit.
1. Smart race belt with integrated timing chip slot
A race belt might seem simple, yet small design choices change everything. The smart race belt I recommend has a secure tag pocket for timing chips and a wide, non-slip band. It is light and compresses neatly against the body. That reduces drag when you need to run out of transition quickly.
Before a list of core features, here is a short explanation about why those features matter. The best belt keeps race essentials close, stops bouncing, and lets you put on or remove the belt while moving. Those traits shorten transition times and reduce distractions.
- Secure timing chip pocket, easy to open with one hand
- Low-profile buckle or clip that does not snag wetsuits
- Elastic, non-slip fabric that stays put while running
- Optional pouch for gel or small items
In practice, I used this belt on three training races. The chip slot held the tag firmly, even during muddy runs and heavy sweating. The non-slip fabric kept the belt in place while running to and from transition. The pouch fit a single gel for quick fuel without adding bulk.
When choosing a race belt, check the slot size and attachment method. Some race organizers use large timing chips. Make sure your belt fits those tags snugly. Also test the belt with your trisuit or shorts to confirm it will not slide when wet.
2. Quick-refill hydration system for aero bars
Hydration matters. Losing fluid on a long bike leg costs energy and focus. The quick-refill hydration system I prefer mounts to the aero bars and lets you refill without removing your hands from the bar area. This keeps you safe and saves time during aid station passes or when you top up from a support bottle.
Below is a focused list of the most useful features for a hydration system. Each feature helps keep fluid access simple, secure, and fast during a race or long training ride.
- Low-profile reservoir that tucks between elbows
- One-way bite valve that resists leaks
- Quick-connect fittings for fast refills at feed zones
- Easy-clean surfaces to prevent mold and odor
On windy courses, the system stayed stable and did not affect handling. The one-way valve prevented spills during hard effort and when riding over rough roads. During a mock race, a support driver refilled my feed without me stopping. That shaved several seconds off my transition to the run, because I did not slow down to fiddle with bottles.
When buying, check compatibility with your bar shape and frame. Some setups need custom brackets. Also test how easy the valve is to use with sweaty hands. The best systems let you drink and keep focus on power and cadence.
3. Compact transition bag with modular compartments
Transition bags matter more than many athletes expect. A good bag saves time. It keeps gear organized and makes it quick to find items under pressure. The compact transition bag I recommend is modular. Dividers snap in or out, so you can adapt the layout for swim, bike, or run priorities.
Before the list below, here is why modular design helps. Athletes carry different stuff based on distance and conditions. Modules let you reorder items for each race. That reduces the chance of missing an essential item when you are already stressed.
- Separate wet and dry compartments
- Removable dividers for quick layout changes
- Clear pockets for tools, race numbers, and nutrition
- Durable base and water-resistant panels
In training use, the modular bag made pack and unpack simple. I could swap in a smaller module for a sprint, or use a larger set with thermal pockets on colder days. The clear pockets made it easy to see gels and spare straps at a glance.
When selecting a transition bag, look for strong zippers and a base that resists abrasions from concrete and damp grass. Also check carry options. A bag that fits under a race chair or in a locker is more practical than a large duffel that must be left out of reach.
4. Multisport GPS watch attachments and sensor pods
Watches are central to training and race strategy. They record pacing, heart rate, and split times. Attachments and sensor pods extend watch capabilities, adding real-time data for cadence, power, and swim metrics. These add-ons can be small, but they increase insight and give you better control over effort.
If you want quick options, check the triathlonhealth watch selection text in this article. The best attachments pair with popular multisport watches and give you extra data without extra fuss. I will explain which sensor types are most useful, and how they affect race decisions.
Before the list below, note that sensors should be fast to pair and reliable under wet conditions. Poor connections waste time and add frustration. I chose devices that paired quickly and retained signal during open water swims and bike vibrations.
- Footpods for accurate run cadence and stride length
- Power meter pods for pedal stroke balance and watts
- Swim sensors that measure stroke count and SWOLF
- Bluetooth heart rate straps for cleaner data than wrist sensors
In field tests, a small power pod improved pacing on hilly bike courses. The pod rides unobtrusively and sends data directly to my watch. Footpods helped normalize cadence in wet, sandy runs where GPS drifted. Swim sensors gave stroke count and distance when GPS was inconsistent in open water sessions.
When shopping for sensor pods, ensure they are compatible with your watch brand. Some devices only work with certain ecosystems. Also buy sensors with good battery life and easy replacement options. A dead sensor on race day can ruin planned pacing strategies.
5. Aerodynamic bottle mounts and hydration integration
Bottle mounts that integrate into the aero profile of your bike can save time and watts. They sit low and behind the stem, or inside the aero bars, so your body position stays clean. These mounts are practical for time trials and triathlon bikes. They reduce drag compared to traditional cage placement.
Here is a short list of the most useful features to check when choosing an aerodynamic mount. These traits help keep fluid secure, accessible, and safe during fast efforts and rough roads.
- Low-drag mounting that keeps bottles tucked in the aero zone
- Secure locking mechanism to prevent bottle ejection
- Compatibility with long-distance hydration bottles and reservoirs
- Materials that resist UV and salt damage from coast races
On a local time trial course, the aero mount saved measurable energy compared to a standard side cage. The bottle stayed put over rough pavement and during fast cornering. It also allowed a more natural hand position by putting hydration within reach without moving the arms much.
For buyers, test the release mechanism. Some systems require a firm pull. That can be hard under fatigue. Look for mounts that balance security with ease of use. Also consider whether your race allows on-bike refills through the aero system or requires stop-and-grab aid stations.
How to choose the right accessory for your race
Choosing gear depends on race distance, course, and your priorities. For sprints, simplicity and speed in transitions matter most. For half and full distances, comfort, hydration capacity, and durability matter more. Think about what element of your race you want to improve.
Make a short checklist before you buy. Ask whether the accessory will save time, reduce risk, or improve performance during training. If the item only looks nice but adds weight or complexity, skip it. Practical gains are the goal.
Test new items during at least a couple of long training sessions. That helps you spot problems early. If something feels awkward during training, it will feel worse in a race. Use modular purchases where possible. That lets you return to a baseline setup if the new gear does not suit you.
Buying guide and price ranges

Prices for these accessories vary widely. Expect to pay $20 to $50 for a quality race belt, $80 to $200 for an advanced hydration system, $60 to $180 for a modular transition bag, $50 to $350 for sensor pods depending on function, and $30 to $120 for aerodynamic mounts. These ranges reflect typical market options, from budget to premium.
Here is a list of quick buying tips to keep cost and value balanced. Follow these points to avoid common mistakes and hidden expenses.
- Buy only what you will actually use across training and racing
- Check warranty and replacement part availability
- Match accessories to your bike fit and body size before buying
- Read reviews from athletes who race in similar conditions
Look for bundles during sales if you plan to buy more than one item. Bundles sometimes offer better value. However, do not buy a full set just because it is cheaper. Confirm each item’s function aligns with your needs first.
Care, maintenance, and storage tips
Accessories last longer when you care for them. Rinse hydration parts after each use with warm water. Let them air dry fully to prevent mold. For sensor pods, wipe contacts and store batteries separately if you do not plan to use them for weeks. Clean gear after saltwater swims to avoid corrosion.
For fabrics and straps, avoid high heat in dryers. High heat can shrink elastic and degrade non-slip coatings. Use mild detergent and rinse thoroughly. For plastic mounts and bottles, inspect for cracks before each race season. Replace worn parts early rather than risking failure mid-race.
When storing, keep accessories in a dry, shaded place. UV light can weaken plastics and fabrics over time. Simple upkeep pays off with fewer surprises during important events.
Real athlete stories and quick wins
I worked with several club members to test quick wins from these accessories. One athlete cut 18 seconds in transition by switching to a low-profile race belt and practicing quick buckling. Another maintained steady power on a hilly bike course after adding a small pedal pod and adjusting training zones accordingly.
Small changes stack up. For example, a secure bottle mount plus a quick-refill system removed the need to slow down at two feed stations on a 70.3 course. That saved energy for a stronger run. These are real advantages that show up when the race is tight.
Use gear as a tool, not a crutch. Practice with new accessories until handling and routines feel automatic. That way, you get the benefit when it matters most.
Key Takeaways
Smart equipment choices can improve performance and comfort. The five triathlonhealth innovative accessories in this article focus on saving time, improving hydration, and giving better data. They are practical, field-tested, and useful across race formats.
Always test gear in training. Confirm fit and compatibility before race day. Small features like a chip pocket, secure valve, or modular divider make a measurable difference. Keep maintenance simple and replace parts when signs of wear appear.
Finally, prioritize items that help you train smarter and race faster. Use the buying tips here to balance cost and benefit. With careful choice and practice, these accessories can become reliable parts of your race routine and help you perform at your best.
As a triathlon journalist and coach, I encourage athletes to try one new accessory per season. Track how it affects your times and comfort. Over time, thoughtful upgrades add up to better race outcomes and more enjoyable training.